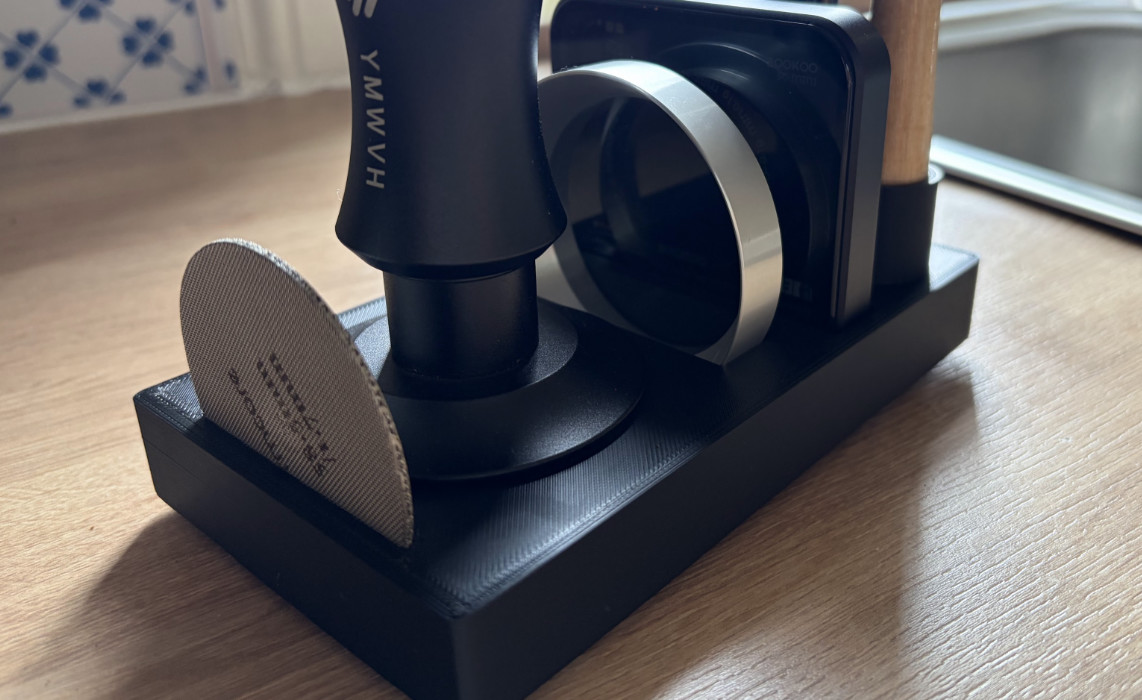
One of my favourite designs and prints so far - a custom designed holder for all of my espresso machine accessories, with a perfectly measured slot for each item. (Top surface not ironed).
As the serial hobbyist I am, I've recently taken the plunge into 3D printing with the entry-level (but still excellent) Bambu Lab A1 Mini.
My early prints with the machine were hit or miss - always useable, but not always the quality I was expecting, and I was running into some inconsistencies even when printing the same model multiple times. With that in mind, I gradually did my research, tested a lot of settings on the same handful of models, and came up with the Bambu Studio tweaks below to get consistent prints in as high quality as this printer is capable of. This is using a completely stock machine with the bundled 0.4mm nozzle.
First, some advice
It doesn't matter what your print settings are, if you don't have dry filament you're going to run into quality issues. PLA absorbs moisture from the air, and when that moisture hits a hot nozzle it boils into steam, which is what causes stringing (light, wispy, spider-web like residue all over the print) as well as an overall rough texture. I live in a reasonably humid country and my printer lives in a room where we often dry laundry, so I certainly ran into this early on.
You can buy sealed filament storage tubs with space for a desiccant (this has been working really well for me) or, if you're feeling fancy, an actual powered filament dryer. One thing I didn't realise at first: a sealed tub keeps dry filament dry, but it can't rescue a spool that's already absorbed moisture. If your prints are already stringing, you'll want a dryer to bake it back out. *
* Note: those are affiliate links - if you click through and happen to buy something I get a tiny commission, but it doesn't cost you a penny more. No other aspect of this post is in any way financially motivated.
The settings below can roughly double how long a print takes. This is annoying at first as when you're in the exciting new-hobby honeymoon period you just want to get your prints out, but eventually when printing is more of a background to your life you reach a point where you'd rather guarantee good output, even if it takes longer.
For me if a drawer insert or a hook is a bit rough it doesn't really bother me - I'll just go with the defaults and print fast. But if I'm printing something aesthetically pleasing or that I'll interact with frequently like a phone stand, a candle holder, a vase, I don't want it to immediately and obviously have that cheap 3D printed look. This is when I reach for higher quality settings.
I've used these exact settings with PLA, PLA+, PLA Matte and PLA Silk and been happy with the output. But of course they may not work well in every scenario, feel free to experiment yourself.
If you've made sure your filament is dry and you're still seeing consistent print issues even with these high quality settings, make sure your printer is clean and well-maintained, then run flow dynamics and flow rate calibration (both accessible via the Calibration tab in Bambu Studio). The first tunes the pressure in the nozzle so corners come out crisp instead of bulging, the second fine-tunes how much plastic gets pushed out so your walls aren't gappy or over-stuffed.
My settings
Anything not mentioned below I typically leave at the default value, or whatever values the .3mf file brings with it. The short version: 0.12mm Fine preset, nearest seams, 50mm/s outer walls, 0.38mm line width, tree supports where needed, ironing on flat tops. Details on each below.
Make sure to select your filament (or a close approximation) from the dropdown to ensure an appropriate filament profile is used. This sets sensible temperatures and cooling for that material, and everything else builds on top of it.
This is the unlabelled dropdown which sits above the Quality/Speed/Strength/Support/Others tabs in the sidebar. For high quality printing I set this to "0.12mm Fine @BBL A1M". This drops the layer height from the default 0.2mm, which is arguably the most important setting for a high quality print. Thinner layers mean far less visible stepping on curves and sloped surfaces, so everything comes out noticeably smoother. If you only change one thing, change this.
Set this to "Nearest". Every layer has to start and stop somewhere, and that point is the seam. "Nearest" tucks it into the closest corner rather than lining all the seams up in one visible column down your print. I consistently see the best results with this option, resulting in a near-invisible seam. (On cylindrical models there's no corner to hide it in, so you'll always see a faint seam somewhere no matter what you pick.)
Under Speed -> Outer Wall, I reduce this to 50mm/s. The outer wall is the only one you actually see, so it's worth printing it slowly - you get fewer ripples and a cleaner surface. In the same section also ensure "Slow down for overhangs" is enabled (this is almost always on by default), as overhangs print much better when each layer has time to cool before the next one lands on it.
This can be slightly reduced to 0.38mm. A subtle one, but slightly finer lines render small details a bit more crisply.
Enable these whenever necessary (i.e. if you have large, visible areas of unsupported overhang). Compared to normal supports, tree supports touch your model in far fewer places, so they're easier to remove and leave less scarring. It wastes a little filament, and it could introduce some roughness where the supports connect with your model, but in my experience this is minimal and it's much better than an unsupported print.
This one is highly dependent as, in my experience, it only works on more or less completely flat surfaces. It makes the nozzle do an extra pass over top surfaces to smooth them out with heat and a small amount of extra plastic. In the right scenario though, nothing will give you a smoother finish. Enable it under Quality -> Ironing.
Happy printing, I hope this helped!